Showing posts with label Ornaments. Show all posts

Friday, July 22, 2022

On A Few Wonderland Ornaments: A Photo Post

I bought these about a month ago and decided rather than save them to share in December along with the rest of my Alice ornament collection, today I would go with a Christmas in July themed Photo Post.

I managed to find these three in one bunch. There are a few larger sized (as in about 4 inches versus the little 1 inch wooden ones) wooden Wonderland sets that you see around regularly, but I had never seen these ones before and am actually quite curious to know if there might be more that go with them.

Wooden Christmas ornaments of the White Rabbit and Hatter from Alice in Wonderland
 
I'm very taken with this particular King of Hearts, his mustache, and bright yellow outfit!  
Christmas ornament of the King of Hearts from Alice in Wonderland. 
 
Then there's this four Christmas Hatter with his teapot, which I thought was awfully cute!   

Christmas ornament of the Hatter from Alice's Adventures in Wonderland

♥ ♥ ♥

Sunday, December 27, 2020

On The Remainder of My Christmas Crafting

Aside from the reindeer and a few Christmas cards, I didn't do all that much in terms of Christmas crafting due to some health issues, but I did want to share what I did get done!

I had pulled out my 1964 copy of Christmas Magic by Margaret Perry at the beginning of the month with the intention of making a few of the projects in it. Many of the projects involve aluminum and copper sheets as the primary material because they are meant to serve as candle holders. However, not actually wanting to make candle holders, I decided to give a few of the projects a go using heavy weight metallic paper instead. While I set out to make a few angels and a couple different animals, I ended up just making a donkey with adjustments made to the saddle piece and was quite pleased to find that the metallic paper worked perfectly. 


As for the next round of crafting...While I was looking for Christmas Magic, I also happened upon a few pages torn out of the October 1990 edition of the magazine Crafts 'n Things, specifically saved for the cute little balsa wood house ornaments and the patterns to make them! 

These were supposed to be really simple with an open back and a piece cut out of the base to slip a tiny twinkle light in to get glowing windows. I (as usual) had some different ideas and ended up using the patterns as a starting point. 

The first one I made as a gingerbread house. This one I shortened all the walls and gave a back piece. For the icing and peppermint I added extra hot glue and painted it. The gumdrops are cut out of glitter paper. 


For the others, I decided to go for a dollhouse look and make them as ornaments! For the bigger house I added a strip in the middle to be a second floor and after much eyeballing of measurements, careful cutting (or rather attempts at it), and having glued myself to tiny furniture and tree pieces multiple times, had a house and cabin ready for some tiny inhabitants to celebrate Christmas in them! 


♥ ♥ ♥

Thursday, July 16, 2015

On Christmas in July: A Photo Post

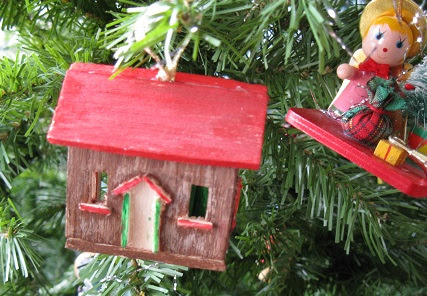
Two ornaments just in time for warmer weather! Now I just need somewhere safe to put them for the next four months.


As a side note, despite saying the Photo Post series was going to be occasional, you can now look forward to seeing them on a regular basis. ♥

Monday, December 29, 2014

On an Invasion of 1950's Pixies!

A belated Christmas story (with apologies for the less than stellar photos, I kept missing the time when the lighting was good)...

We've been invaded by 50's pixies*.
They appeared on the tree the day after Christmas and seemed to be as equally shocked to see us as we were to see them.
Most are rather Christmas-y and we know they’re from the 50’s because almost every ornament they’ve touched now has atomic stars on it, which is quite nice as far as what you might expect when you suddenly find you have pixies in your house. 

We also discovered a purple one that we're assuming must be a New Year's pixie. Unlike the others he seems only to be attracted to the blue and silver ornaments.  
They aren’t bothersome, but we do wonder when they’ll be leaving. We tried explaining to them that it will have to be soon because the tree has to be taken down, but so far this hasn’t seemed to make any difference to them and they continue to merrily sit on the ornaments without a care in the world. 
At this point, we're perfectly willing to let them stay, but as we aren't sure as to how they'll react to being removed from the tree, we can only hope they’ll get homesick and go back to where they came from or that our tree is serving as a temporary rest stop on their way home.
♥♥♥
(*Pattern and instructions for pixies from Va-Voom Vintage. Thank you for sharing, Brittany!) 

Friday, December 20, 2013

On Making Vintage Fabric Scrap Lollipop Ornaments

Welcome to the second half of my ornament making tutorials, which I’ve had typed for a week and just couldn’t seem to get the pictures taken for! Along with the trees in the last post, were also this collection of fabric scrap lollipops (or as I like to call them, my fabric swatch collection of unattainable fabrics. :) ) What I like about these is that they’re super simple and they can be made quickly!
 
Supplies
² Small styrofoam balls (1 ¼ in diameter for this size)*

² Fabric scraps that can be cut into squares

² Pinking shears

² Rounded thin wooden sticks or the lollipop sticks you can find in the baking section of the craft store. (5 ½ inches long is a good length)

² Ribbon (or yarn or string…anything that will tie)

² Christmas tree hooks

² Glue (optional)
*Note: One of the lollipops I have was tied with a twisty tie, so I decided to replace it with a ribbon. Upon removing the fabric I discovered that it had been made, unlike most of the others, with a slightly smashed up silk ball ornament and since I’m lacking in a styrofoam ball to use for this, this is what you’ll be seeing in the photos.

1. To create the lollipop, take the stick (dip the end in glue if you want it stay in firmly) and push it into the styrofoam ball.

2. Using your pinking shears cut your fabric into a square that is at least 6 ¼ inch on each side. It doesn’t have to be a perfect square, but you do want to make sure that when you put the fabric over the ball that the ends won’t be too short to be tied down.

Yes, I know this is not a square. This is the original fabric from this ornament and that's how big it is.
3. Fold the square in half placing the lollipop piece in the center and match the open edges at the bottom. Gather the fabric to the stick and tie with your ribbon. 

Edges matched up!
4. Place a Christmas tree hook through the ribbon and viola, you’re done!
A sweet addition for your tree!
♥♥♥

Sunday, December 23, 2012

On Making a Vintage Look-Alike Snowman Ornament


When looking through one’s family ornaments, there are often ones that bring about the feeling that it would easy to make one or at least one similar to the original. And, thus, because of this, we have today’s post on how to make a snowman ornament that looks like these vintage ones.

 Mr. Clown and Santa (who unfortunately took a tear inducing tumble yesterday and is in need of a new vintage ornament body)
 
Vintage Look-Alike Snowman

Supplies

ªMedium sized glass ball ornament
ª Small glass ball ornament (the size used on miniature trees)
ª Cardboard (corrugated is best)
ªCraft glue*
ªA white or black pipe cleaner
ªBlack felt (the stiff type since this will be for the hat)
ªFelt of any color (for scarf and mittens)
ªSingle strand of embroidery floss and needle
ªWhite, black, and orange acrylic paint and paint brush
ªGlitter (optional)
ªSmall piece of green feather (optional)
ªThree red seed beads (optional)

*For securing the pipe cleaner and ornament to the base and attaching the ornaments together, hot glue can be used for an extra strong and quick drying hold. I would not recommend using hot glue for any of the other steps, though as everything is on too small a scale.  

Instructions
Making the base
1.       Cut a circle about two inches in diameter from the cardboard and paint it white. It you want it to be sparkly add glitter while the paint is still wet!
2.       Take the pipe cleaner and wrap just enough of it around your index finger to form a ring. Remove it from your finger and cut off the extra amount. (If you want your snowman to have feet, make two smaller rings.) 
3.       Take the ring and glue it to the center of the cardboard base. This will keep your ornament stabilized.
 
Building the body
4.       Take the larger ornament and very carefully remove the metal top and loop.
5.       Glue the ornament to the pipe cleaner on base with the top facing upward. This will serve as the neck and provide something to balance the head on!
 
6.       Take the smaller ornament and glue it to the neck with the metal loop facing upward.
7.       If you want your snowman to have arms, cut two pieces off the remaining pipe cleaner and glue them flat against the sides.

Dressing the Snowman

                The scarf and mittens
 
8.      To make the scarf cut a piece of felt that is 4 ¼” by ¾”. Make the fringe by cutting small slits about ½” in on the ends.
9.        Put glue around the neck of the ornament and wrap the scarf around it overlapping the ends making sure to glue them to the ornament as well.
10.   Cut out tiny mittens and glue them to the side or the arms

The hat-measurements may vary on this part so before gluing anything make sure you check the height of the strip that forms the hat to ensure it is at least as high or higher than the loop for hanging the ornament. 
11.    Using the black felt cut out a small circle (about 1 ¼” or 1 ½”) for the hat brim that is slightly larger than the diameter of the ornament being used for the head. Cut a hole in the center of it so the top of the ornament can poke through and it can rest nicely on the head12.    Cut a strip of felt about ¾” wide and 3 ¼” long. Roll it to make it the right size to fit the hat rim and glue the overlapping ends.
13.    Glue the part that makes up the hat to the hat brim. This part can be a bit tricky because you want enough glue to keep the pieces together, but don’t want it oozing out.
Steps 13 and 14
 
14.    Cut a 9 inch piece of thread and fold it in half at the middle so you have a loop at the end.  Take the end with the loop and thread it through the ornament hanging loop. Put the other end of the thread through the loop and pull so the thread is securely attached to the ornament.
15.    Take the hat piece and place it (don’t glue it) on the snowman’s head, making sure to have the thread coming out through the top.
16.    Glue the rim and hat piece to the head.
17.    Cut another small circle to make the top of the hat. Do NOT glue it on yet!!!
Step 18
 
18.   Thread the needle with the loose ends. Taking the top of the hat pull the needle through the center. Remove needle and tie a double knot in the thread at the length desired, so you’ll now have something to hang the ornament with.
19.    Glue the top of the hat to the main hat piece making sure the overlap is at the back.
 
Finishing Details
20.       Paint on eyes, nose, mouth, buttons, and any other details you might want to include.
21.      
22.      Hang it on the tree and enjoy! ♥