Showing posts with label Bookbinding. Show all posts

Friday, April 2, 2021

On "Wallpaper Octopus": An Artist Book & Poem

In honor of National Poetry Month and as a follow-up to my last paper crafting post, this is another book style made from a tutorial given as part of the virtual Form & Function From Afar conference held by Book Paper Thread

After making my first triangle fold book, I immediately started thinking about all the interesting possibilities that this form would allow for and for some reason doing an octopus theme stuck with me. Going in somewhat of a Victorian Steampunk direction, I then moved on to thinking about how it'd be interesting to have a wallpaper print paper and have the octopus tentacles coming out of it.

Since this was along the lines of something else I've been brainstorming for a writing project and having had more of a yearning in the past year to illustrate some of the poems I've written, I ended up writing a poem to go with the book before I even started making it. 

Once the book portion was done, created using cardstock for the cover and scrapbook paper for the inside (including a copy of the original paper for the inside section since I cut my paper on the wrong grain and only had one piece), I created the octopus tentacles from a one sided textured paper, which worked out nicely for painting the suction cups on. Then I debated where the poem should go, but opted for writing it in a subtle brown colored pencil along the side of the pages and like how it took on a sooty appearance rather than being boldly noticeable. I also rewrote it on another slip of paper and tucked it in between the cover and the inside piece (the top and bottom of the cover are folded down about half an inch creating a "holder" it neatly slid into). There may also be the body of an octopus hiding in there, but as I'm not completely satisfied with it, that will be a picture for another day.

As I didn't have any joint pain this past weekend (something that's been keeping me from sewing or working on anything extensive), I threw myself into this and am rather pleased with how it turned out!

Wallpaper Octopus

 The paper has begun to tear
A ripple here, a crinkle there
A rustling in the wall at night
A cautious mouse, just out of sight?


Something moving in the wall
You can hear it in the hall
Something pulsing, then a push
Suckling crackle, then a swoosh!


In the parlor, near the chair!
Can you see it? Something--there!
Wiggly, waving tentacle
At the paper starts to pull...

I think this is the first piece of my poetry I've shared on here, so I hope you've enjoyed it! Happy start of National Poetry Month and may your walls be octopus free!

♥ ♥ ♥

Sunday, February 21, 2021

On Some Paper Pleating

Despite having a number of posts in draft state, I haven't really felt like posting lately, but I wanted to share pictures of something new I learned how to do this week.

Over the past few days I attended the free virtual conference Form & Function From Afar being held by Book Paper Thread, which focuses on paper and book arts. It consisted of nine presentations (three per day), along with multiple discussion areas, including places to share tips, discuss the presentations, and a virtual book sale (which featured some gorgeous and whimsical artist books!).

On the second day, I attended an interactive webinar called "Cut Pleat Twist" given by Gina Pisello, which walked us through the steps of a basic project using an 8 1/2 x 11 paper. While I had seen things here and there in relation to the particular method shown, I had yet to actually try it and, having found it to be fairly quick and easy to do (and that it nicely complements my origami and kirigami skills), I have to say I'm now imagining all sorts of possibilities of how to use it in making artist books and cards! 

Anyway, that being said, after a little bit of experimenting with magazine pages to make sure I understood how to get the right part of the paper as the "outer frame" portion, these are my first attempts at doing something more artsy with the technique. 

I cut a 12 x 12 piece of one-sided scrapbook paper down to fit in the printer, selected a few images from The Floral Magazine (1861) on the Internet Archive to print on the blank side, and then cut it in half to make two tiny folded papers. For the larger one, I used images from the same book, but just printed it two sided. 

After I finished folding them, I used decorative scissors to to trim the edges of the small ones and added leaves sticking out the folds. For the large one, since I the cuts I made when doing the folding ended up looking a bit like a shield, I cut the ends to be pointed in the center and then used one of the cut pieces along the top. 

Front

Back
 
As a side note, the presentations were recorded and, while currently only on the conference site, are supposed to eventually be viewable on the Book Paper Thread youtube channel. I will update this post with the link to the webinar for this when it becomes available for those interested.

Saturday, September 19, 2020

On Making Fish Skin Parchment

Yes, you read that title correctly--I made fish skin parchment.

In April, Peter D. Verheyen provided a webinar on how to go about making parchment from fish skin, which I finally got around to watching last month.

My initial response to watching it was that while it was certainly interesting, I didn't know that I'd actually ever want to try it. But then the more I read about its history and the process of making it and fish skin leather, the more intrigued I became and ultimately decided that I really did want to try!

Having finally had salmon for dinner, I gained three small skins and, following the video and Verheyen's ""Fips" and His Eels: Fish Skin in Bookbinding", began the process. I started out by placing my three small skins in dish detergent filled jar in the refrigerator to rinse. Having no unscented detergent in the house that wasn't also dyed, I ended up having to use undyed, lemon scent, which I don't think had too big of an impact (though this being my first attempt I might not have noticed if something was amiss).

The next day I took them out for their first scraping, which I did with the back of a butter knife and the side of a spoon. A considerable amount of meat came off, as you can see!  

Over the next few days I repeated this process to get any remaining meat off and with changes of the sudsy water in between.

Not sure how it would go and with the risk of a rather curious feral cat in the yard, I decided to spread out my drying days, which I probably would have done anyway given that one of the skins needed more scraping than the other two even after soaking a few days. I'm not sure if part of this was using slightly warmer water one day in the rinsing process, as it seemed a littler fibrous, but overall it dried out just fine with nothing noticeable about it.

To dry them, I covered a small piece of corrugated cardboard with plastic wrap and then stuck another piece of cardboard underneath to ensure the pins would hold in place. Then with scale side down and pulling the skin taunt as I went, I put pushpins around the edge, and out into the sun they went. Each skin was outside for somewhere between three to six hours. In the case of the first skin the pins pulled up a little as it dried, but having experienced that I did a better job pinning with the other two. 

My drying process involved putting them on the armrest of our glider and putting a piece of tree branch atop the cardboard to keep it in place (also to create a noise so I'd know if the cat got nosy-which thankfully didn't happen). 

Fish skin #1

Fish skin #2


Fish skin #3
And here's what I ended up with! While I didn't notice a smell when I was scraping them, being in the sun and the heat brought out the oils, which have made the skins somewhat smelly (although it has dissipated over the course of the two week since I dried them), so I'll be wiping it them down with alcohol before I use them.


Overall, I really enjoyed my first attempt at doing this!
At this point, I'm undecided about what I'm might want to use them for, but I do have a few ideas for mini books in terms of both using them as part of the cover and as "textured paper" elements, so eventually there will be a another post about them! ♥️  

Thursday, May 28, 2020

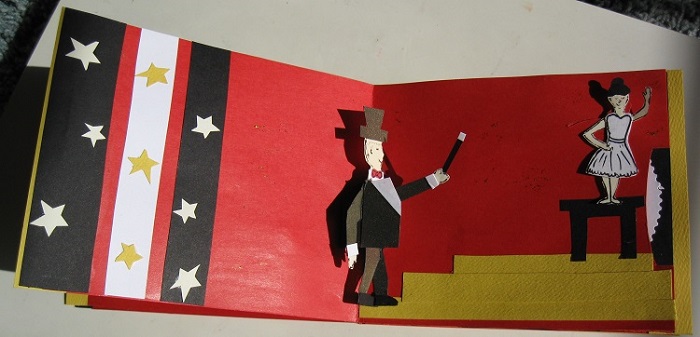
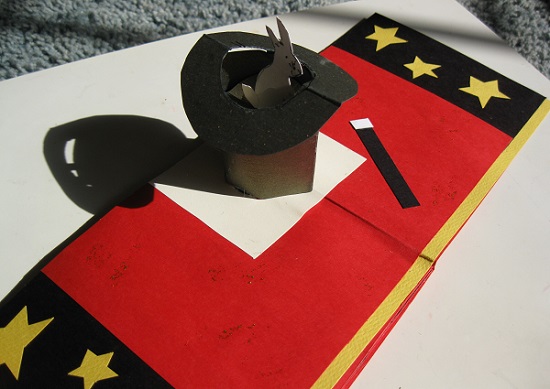
On A Magical Pop-Up Book!

Something funny happened on the way to making a garden tunnel book--I ended up making a magic show pop-up book instead. 

I'm not entirely sure where the idea came from, but it started with wanting to make a hat with a rabbit in it and took off from there. While I've been using pop-up elements in cards for years and made a simple pop-up book for a book report in high school, this is my first attempt at putting together a book with fancier elements. 

It took me a total of nearly three full days to make and while not perfect (I eyeballed a lot rather than measuring), for the most part I'm very pleased with how it turned out. 

Now without further ado, I present to you, Abracadabra! 


♥️ ♥️ ♥️

Friday, May 15, 2020

On Things to Do While You're At Home: Make Tiny Books

Inspired by the British Library's Discovering Children's Books project and their very cool request for children in Britain to submit their pictures of their own tiny books on Twitter, I decided to finally make an attempt the miniature stick binding toothpick book from Making Handmade Books by Alisa Golden.

These books are made up of eight pieces of paper folded in half with a small paper square glued inside for extra support. The spine is punched through and before gluing the paper shut, a cut pointless toothpick is placed in each fold. Thread is then placed through the holes and knotted around each toothpick to connect all the pages together.  The Tiny Sewing Notions! book is somewhat of a continuation of the tunnel book I made in 2018 and The Insomniac Stars is just me being silly. 


In an experimental mood, I also thought I'd try something different today and present these books in the form of videos!


♥ ♥ ♥

Sunday, July 29, 2018

On Bookbinding (Round 3): A Photo Post

Well, I guess this month I will only be sharing bookbinding photos and the usual book review post. 

This is my last set of books for my book binding class. 

First is a sewn board binding book with pics of what it looked like inside after sewing it (linking stitch and kettle knot at end), once the Japanese tissue was put on it, and then the final product once the spine cloth and cover paper were wrapped around everything (three layers inside that cover) and the endsheets were glued down. I'm not confident that I did the spine part right, since it seems to extend past the text block too far, but I followed the measurements in the instructions and once it was glued there was nothing I could do about it. 


Next is my final project, which is a tunnel book I have entitled "The Sewing Room". I went way overboard on it, but am pretty happy with the results. All the images, aside from the pattern pictures and fabric swatches, are pictures of my actual sewing supplies and notions. :)


♥️ ♥️ ♥️

Wednesday, July 11, 2018

On Bookbinding (Round 2): A Photo Post

Next round of my bookbinding efforts.

First up is my carousel book stretched out rather than in a circle (it's in the mail currently, so maybe in a few weeks I'll picture of it in circular form).


Then we have what has become my favorite book to make, the tunnel book! Technically this was just supposed to serve as a model, but the Walrus and the Carpenter made it in. 


And finally, my long stitch book, which took a long time to do and involved some un-stitching, re-stitching, accidentally jabbing myself with an awl and needle, and nearly poking a hole in the cover trying to sew the last page section in. Still somewhat concerned it has some construction issues, but for a first attempt I think I did okay.  


Next round you'll be seeing a sewn board book and my final project, a tunnel book that I have decided to describe as what you'd expect if a bulletin board used for planning in a sewing room decided to hold a fashion show!

🕮

Friday, June 15, 2018

On Bookbinding (Round 1): A Photo Post


This was supposed to be a sewing/outfit post (in a sense it kind of still is about sewing), which is unfortunately still in draft state, but due to being really busy lately you're getting another Photo Post! 

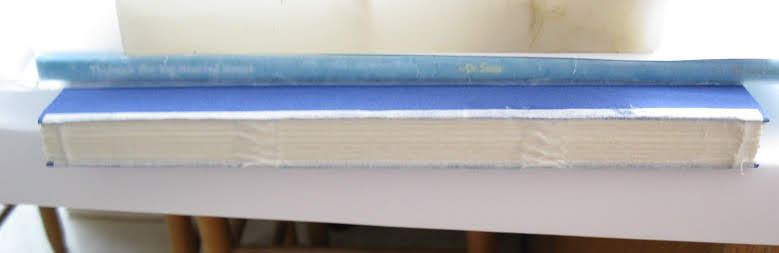
Last weekend I started learning the basics of bookbinding, which involved making a simple pamphlet, a dos-a-dos pamphlet, a two section pamphlet, and an accordion book. For it being my first attempt at making these particular types of books, I feel I did pretty well and am hoping this weekend's carousel and tunnel books look just as good.


This one involved a struggle in getting the two sections to line up with each other and stay lined up as I poked holes through both sections of pages and the two layers of the center cover piece. 


Beautiful turquoise on the outside cover and pretty red on the inside!


♥️ ♥️ ♥️